




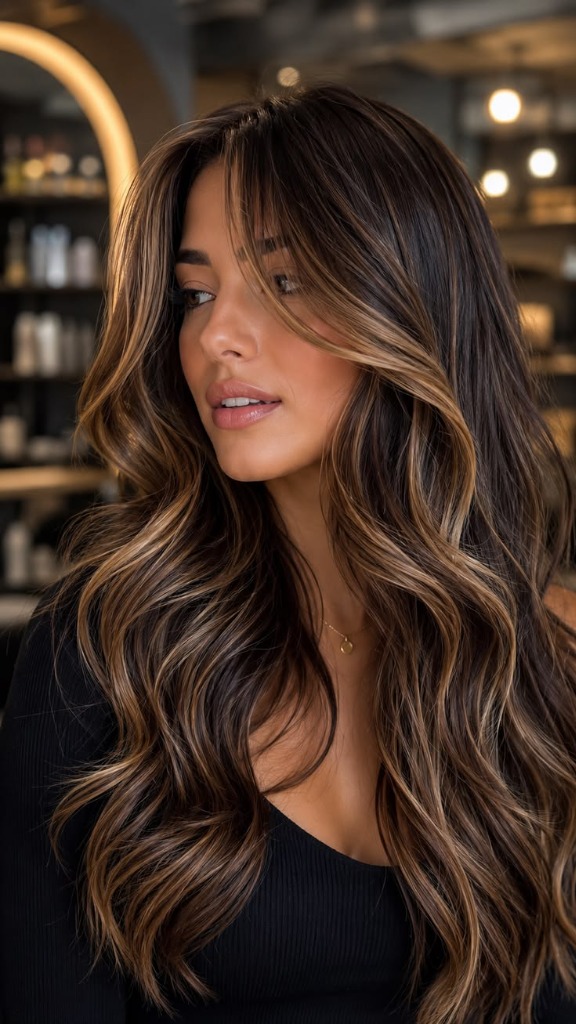

Step-by-Step Braided Rosette Low Bun Tutorial (The Ultimate Romantic Updo)
Learn how to master this viral 9-step braided rosette low bun updo. An effortless, romantic hairstyle with 12-hour hold perfect for weddings, bridesmaids, galas, or elevated date nights.

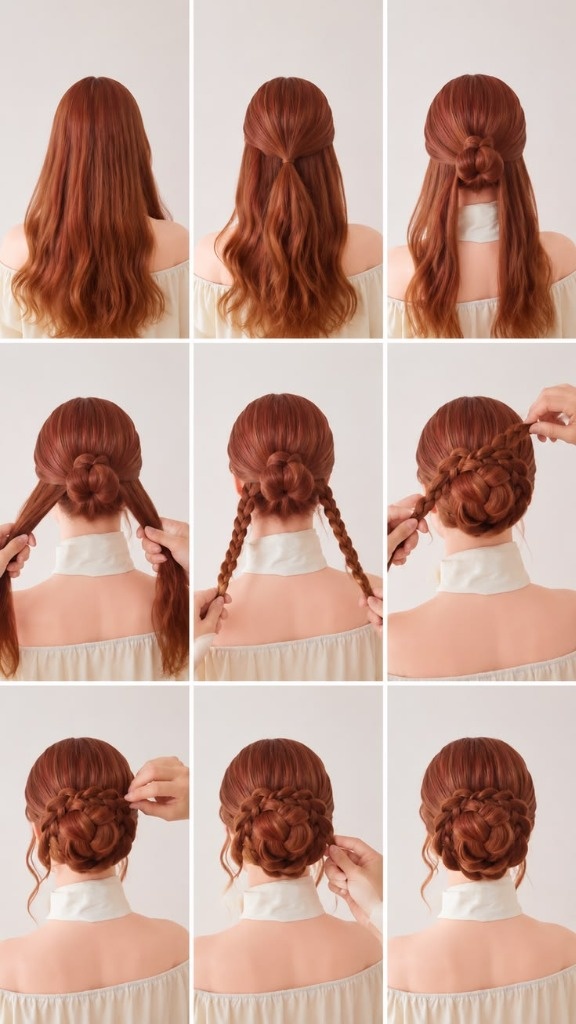
If you are searching for an updo that effortlessly balances romantic sophistication, intricate salon-level texture, and all-day security, the Braided Rosette Low Bun is the holy grail. While this hairstyle looks like a complex creation crafted by a high-end celebrity bridal stylist, it is actually built upon an ingenious three-anchor structure: a half-up rosette center enveloped by two simple side braids. Whether you are walking down the aisle as a bride or bridesmaid, dressing up for a black-tie gala, or wanting an elevated look for a romantic dinner, this comprehensive step-by-step visual tutorial will guide you through crafting this viral masterpiece in under 10 minutes.
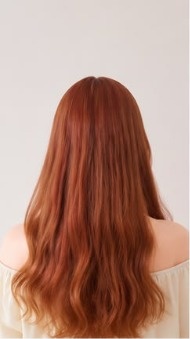
Step 1: Prep Hair with Soft Waves & Texture
The secret to a voluminous, romantic updo that stays in place all day begins with proper hair prep. Start with dry hair that has a natural soft wave, or gently wrap 1-inch sections around a 1.25-inch curling iron to create dimensional movement. Avoid freshly washed, overly silky hair—day-two hair possesses the ideal natural grip. Lightly mist your mid-lengths and ends with a flexible dry texturizing spray to add body, separation, and friction.
"Pro Tip: A light dusting of styling powder or dry shampoo at the crown prevents hair from slipping flat while styling."
— Sarah Jenkins
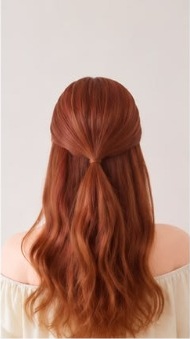
Step 2: Create the Half-Up Crown Ponytail Anchor
Section off the upper crown portion of your hair, starting from just above the ears and meeting horizontally at the back of the head. Smooth the top surface gently using a boar-bristle brush or your fingers for a soft, natural finish. Secure this half-up section firmly with a small, snag-free clear elastic band right at the mid-back of your head.
"Pro Tip: Gently pinch and pull 2–3 small strands at the crown to introduce subtle volume and height before moving to the next step."
— Sarah Jenkins
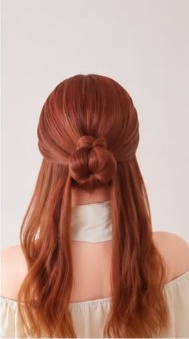
Step 3: Form the Central Rosette Core Bun
Take the half-up ponytail you just secured. Twist the tail gently along its length, then coil it clockwise around the base of the elastic to form a compact, rounded rosette bun. Secure the edges of the rosette with 2 to 3 bobby pins or U-shaped hairpins inserted horizontally against the scalp. This creates the structural foundation that supports the entire updo.
"Pro Tip: Keep this central bun snug and neat; the subsequent braided layers will wrap around it to add dramatic volume."
— Sarah Jenkins
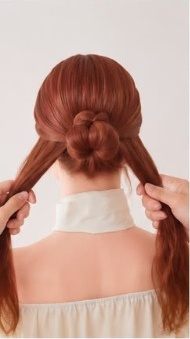
Step 4: Divide the Remaining Lower Lengths
Bring your hands down to the remaining loose hair hanging beneath the crown rosette. Use your thumbs or a tail comb to divide this lower section into two equal halves—one on the left side and one on the right side. Drape each half forward over your shoulders to keep them cleanly separated and ready for braiding.
"Pro Tip: Leave out a couple of delicate, wispy tendrils in front of your ears if you want soft, face-framing pieces in the final look."
— Sarah Jenkins
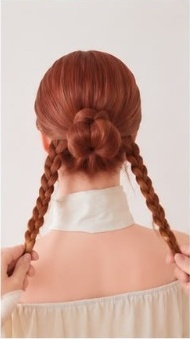
Step 5: Braid Both Lower Side Sections & Pancake
Plait each side section into a classic three-strand braid from the nape down towards the ends. Secure the bottom of each braid with a micro clear elastic band. Once secured, perform the 'pancaking' technique: gently tug the outer loops of each braid with your fingertips to widen and loosen them. This doubles the visual thickness and imparts an ethereal, boho-romantic texture.
"Pro Tip: Lightly mist the braids with hairspray before pancaking to prevent flyaways and ensure clean, defined loops."
— Sarah Jenkins
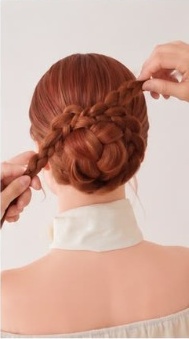
Step 6: Wrap the Left Braid Over the Central Rosette
Take the left braid and lift it diagonally upward across the back of your head. Wrap it smoothly over the top of the central rosette bun in an arching crown motion. Tuck the tail end of the braid neatly underneath the right side of the bun, concealing the elastic band. Secure it firmly with 2 interlocking bobby pins.
"Pro Tip: Insert bobby pins with the wavy side facing down toward your scalp for maximum grip and locking strength."
— Sarah Jenkins
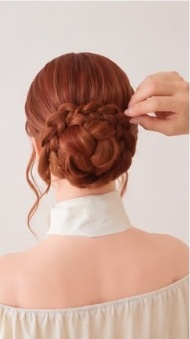
Step 7: Wrap the Right Braid to Encircle the Base
Now take the right braid and lift it across the opposite side, wrapping it around the lower curve and outer perimeter of the rosette bun. By layering this braid against the first one, you encircle the central core in an intricate basket-weave pattern. Tuck the final tail securely beneath the bun.
"Pro Tip: Ensure both braids sit flush against each other to form a seamless, unified chignon silhouette."
— Sarah Jenkins
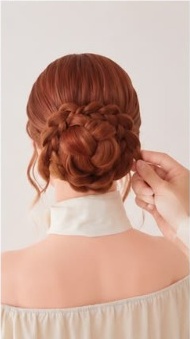
Step 8: Lock in with French U-Pins & Refine Texture
Inspect the bun from all angles using a hand mirror. Insert 3 to 4 French U-pins around the perimeter by catching a small piece of the braid, rotating the pin 180 degrees, and pushing it straight into the base of the bun. Gently tug at outer braid ribs to customize the width and ensure absolute symmetry.
"Pro Tip: French U-pins offer superior, weightless hold compared to standard bobby pins and won't flatten your braid loops."
— Sarah Jenkins
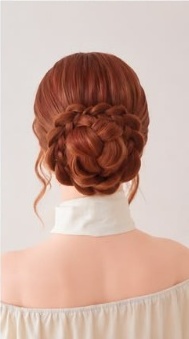
Step 9: Style Face-Framing Tendrils & Set All-Day Hold
To finish your romantic braided rosette updo, touch up any loose front tendrils around your collarbone and cheekbones with a curling wand. Finish with an even, lightweight mist of flexible-hold hairspray and a touch of glossing shine spray. The result is a stunning, bridal-grade chignon that stays secure for 12+ hours.
"Pro Tip: For weddings or evening galas, slide a pearl hair vine, baby's breath, or crystal hairpin along the top braid ridge for an enchanting finish."
— Sarah Jenkins
Kristin Ess Dry Working Texture Spray & French U-Pin Set
Delivers weightless texture, effortless braid grip, and all-day flexible hold without stickiness or stiffness.
✓ What We Loved (Pros)
- •Stays firmly in place for 12+ hours without sagging or slipping
- •Gives the illusion of thick salon-styled hair even on fine or medium textures
- •Requires zero heat tools once hair is prepped and takes less than 10 minutes
✕ Things to Keep in Mind (Cons)
- •Shorter layers may need 2–3 additional mini bobby pins at the nape
Frequently Asked Questions
Q: What hair length works best for this braided rosette updo?
This style works exceptionally well on medium to long hair (collarbone length and beyond). If you have shoulder-length hair, position the central bun slightly lower towards the nape.
Q: How do I make the rosette bun look fuller if I have fine hair?
The secret is pancaking the braids! Before wrapping the braids around the center bun, gently pull apart each outer rib. This instantly doubles the perceived thickness.
Q: Can I add hair accessories like pearls or flowers?
Absolutely. The woven grooves of the overlapping braids create natural anchor points for pearl hairpins, floral vines, or jeweled bridal combs.